If you’re looking for How to Disable SSD in BIOS for your Solid State Drive (SSD), it may seem like a daunting task. However, with the right knowledge and guidance, you can easily disable your SSD and get back to using your computer. In this article, we’ll walk you through the steps necessary to disable your SSD in the BIOS and provide you with all the information you need to know.
Why Would You Want to Disable it?
Before we delve into how to disable SSD in BIOS, it’s important to first understand what an SSD is and why you might want to disable it in the first place.
There are several reasons why you might want to disable your SSD. For example, if you’re experiencing issues with your SSD, disabling it can help troubleshoot the problem. Additionally, if you’re upgrading your computer’s hardware and plan to replace your SSD with a different type of storage device, you’ll need to disable it before you can remove it from your computer.
Step-by-Step Guide How to Disable SSD in BIOS
Now that you know why you might want to disable your SSD, let’s dive into the steps you’ll need to take to do so. The process will vary slightly depending on your computer’s manufacturer and model, but the following steps should work for most systems.
Step 1: Access the BIOS
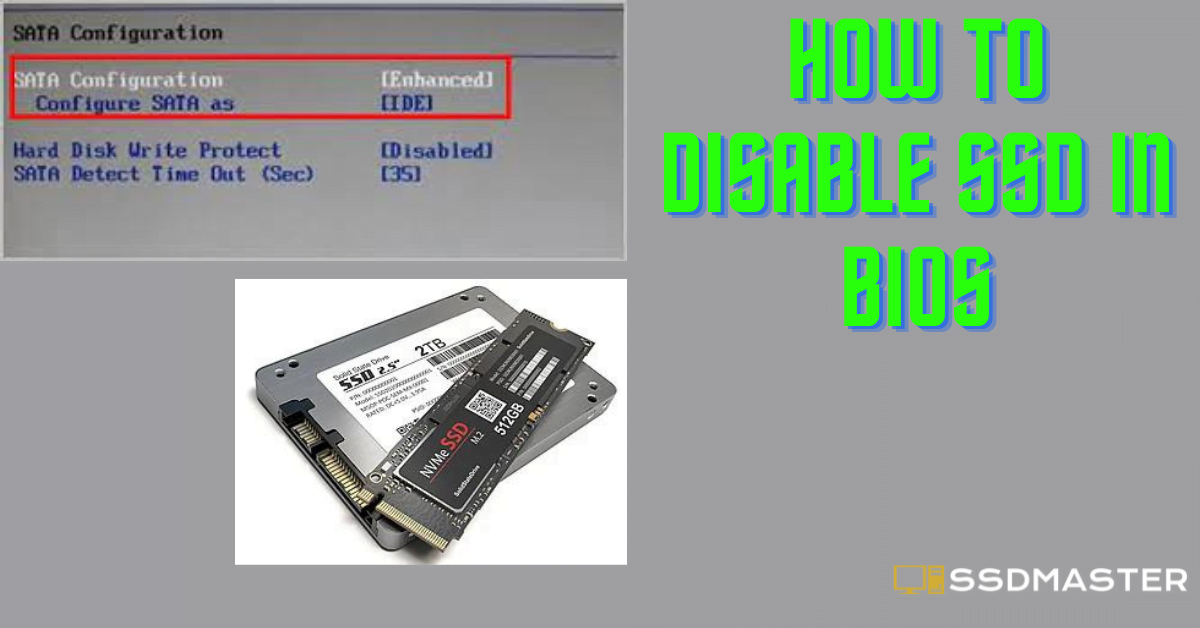
The first step to disabling your SSD is to access your computer’s BIOS. To do so, restart your computer and look for a message that indicates which key you need to press to enter the BIOS. Common keys include F2, F10, and Del. Once you’ve entered the BIOS, you’ll need to navigate to the “Storage” or “Advanced” tab, depending on your BIOS version.
Step 2: Find the SSD Option
Once you’re in the “Storage” or “Advanced” tab, look for an option that refers to your SSD. This may be labeled as “SATA Configuration” or “Storage Configuration,” and the specific option you need to select may vary depending on your computer’s manufacturer.
Step 3: Disable the SSD Option
Once you’ve found the SSD option, you must disable it. This may involve changing a setting from “Enabled” to “Disabled,” or simply selecting an option that says “None” or “Off.” The specific steps will vary depending on your BIOS version and computer model, so consult your user manual or the manufacturer’s website for more detailed instructions.
Step 4: Save Your Changes and Exit
Once you’ve disabled the SSD option, you must save your changes and exit the BIOS. To do so, navigate to the “Exit” tab and select the option to “Save Changes and Exit.” Your computer will then restart, and the SSD should be disabled.
How to re-enable your SSD again after disabling it in the BIOS
you can enable your SSD again after disabling it in the BIOS. Simply follow the same steps outlined in this article, but select the option to enable your SSD instead of disabling it.
Potential Issues When Disabling SSD in BIOS
While disabling your SSD in the BIOS is a relatively straightforward process, there are a few potential issues that you should be aware of. These include:
Compatibility Issues
If you’re planning to replace your SSD with a different type of storage device, you’ll need to make sure that the new device is compatible with your computer’s hardware and software. This may involve updating drivers or firmware or making other changes to your system.
Data Loss
If you disable your SSD without backing up your data first, you could risk losing all of your files and data. It’s important to create a backup of your data before
creating a backup of your data before disabling the SSD
To avoid losing your data, it’s essential to create a backup of your files before disabling your SSD. You can do this by transferring your files to an external storage device, such as a USB drive or an external hard drive. There are also cloud-based storage options available, such as Google Drive or Dropbox, which can provide an additional layer of protection for your data.
Unintended Consequences
Disabling your SSD can have unintended consequences, such as causing other hardware or software issues. Before disabling your SSD, it’s important to understand the potential impact on your system and ensure that you’re prepared to deal with any issues that may arise.
Conclusion
Disabling your SSD in the BIOS is a process that requires careful consideration and preparation. By following the steps outlined in this article, you can disable your SSD safely and effectively, and avoid any potential issues that may arise. Remember to create a backup of your data, be aware of compatibility issues, and be prepared to deal with unintended consequences.
FAQs
Can disabling my SSD in the BIOS harm my computer?
Disabling your SSD in the BIOS should not harm your computer. However, it’s important to be aware of potential unintended consequences and be prepared to deal with any issues that may arise.
How do I know if my SSD is causing issues with my computer?
If you’re experiencing issues with your computer, such as slow performance or frequent crashes, it’s possible that your SSD may be the cause. Running diagnostic tests or consulting with a computer technician can help you determine if your SSD is causing problems.
Is it possible to disable only certain partitions on my SSD?
Yes, it’s possible to disable certain partitions on your SSD. This may involve changing settings in your operating system or using third-party software to modify your partitions. However, this process can be complex and should be approached with caution.