A growing number of people are turning to solid-state drives (SSDs) because of their high speed and reliability. One of the features that make SSDs stand out is TRIM, a command that helps maintain the drive’s performance by clearing unused data blocks. However, there are some situations where disabling TRIM may be necessary, such as when using an older operating system or an incompatible drive. In this article, we will provide you with a step-by-step guide on how to disable SSD TRIM.
Understanding SSD TRIM
Before we proceed to disabling SSD TRIM, let us first understand what it is and how it works. TRIM is a command that informs the SSD that blocks of data are no longer in use and can be safely wiped. This process helps prevent performance degradation, as it allows the drive to optimize the allocation of storage space and maintain high-speed performance over time.
Reasons to Disable SSD TRIM
Despite the benefits of TRIM, there are some instances where disabling it may be necessary. Here are some of the reasons why:
- Older operating systems: Some older operating systems, such as Windows 7, do not support TRIM. Disabling it can help prevent compatibility issues and maintain optimal performance.
- Incompatible drives: Some older SSD models do not support TRIM, and enabling it can cause data loss or corruption. Disabling it can help prevent these issues.
- Virtualization: When using virtualization software, disabling TRIM may be necessary to prevent conflicts with the virtual drive.
How to Disable SSD TRIM
Now that you understand the reasons for disabling SSD TRIM, let us proceed to the step-by-step guide on how to do it.
Step 1: Open the Command Prompt
To disable TRIM, we will be using the Command Prompt. To open it, press the Windows key + R on your keyboard to bring up the Run dialog box. Type “cmd” and press Enter, or click on OK.
Step 2: Check TRIM Status
Before disabling TRIM, it is essential to check its current status to verify whether it is enabled or disabled. To do this, type the following command in the Command Prompt and press Enter:
fsutil behavior query DisableDeleteNotify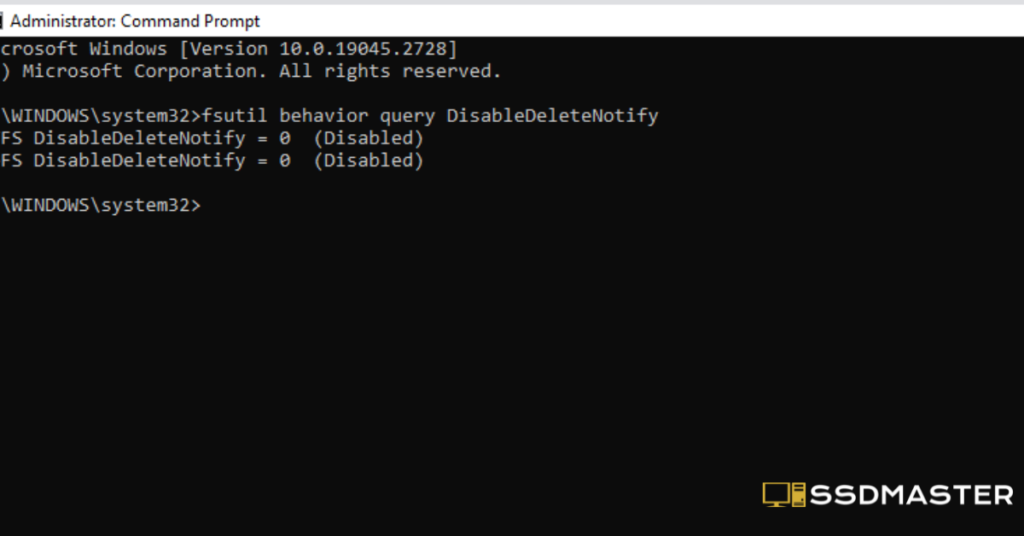
If the result is “0,” TRIM is enabled. If it is “1,” it is disabled.
Step 3: Disable TRIM
To disable TRIM, type the following command in the Command Prompt and press Enter:
fsutil behavior set DisableDeleteNotify 1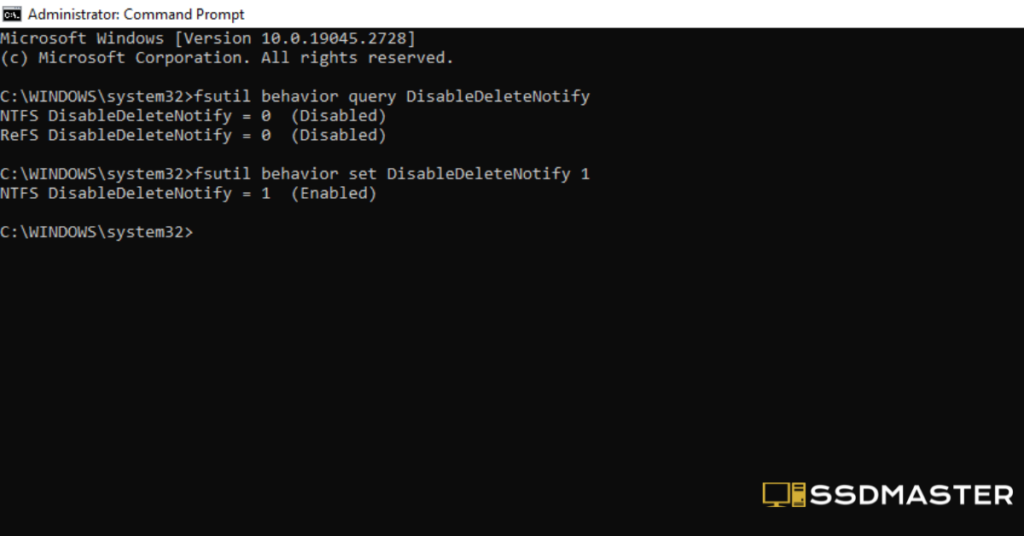
This command will disable TRIM on your SSD.
Step 4: Verify TRIM Status
To verify that TRIM has been disabled, type the following command in the Command Prompt and press Enter:
fsutil behavior query DisableDeleteNotify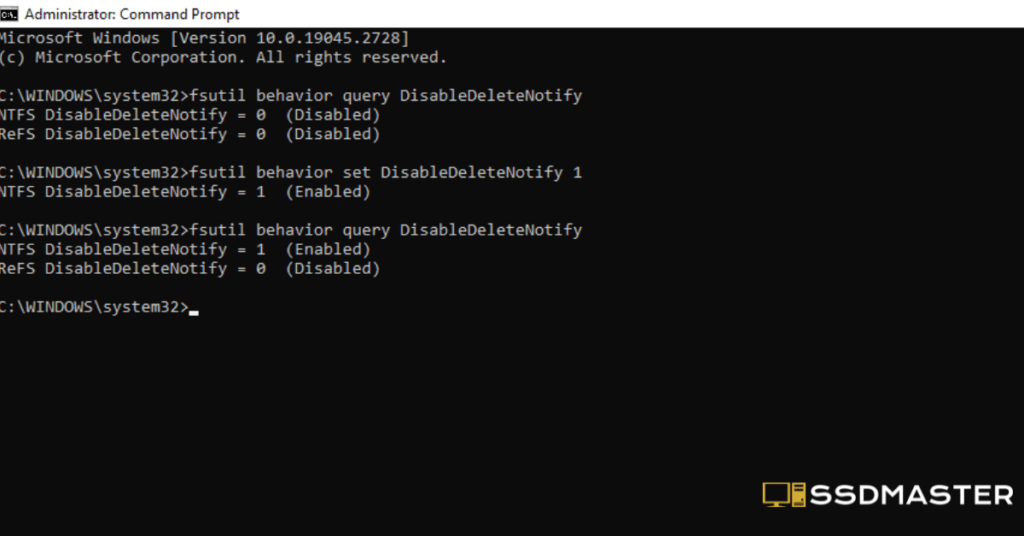
If the result is “1,” TRIM is now disabled.
Edit it on another source
(Before disabling the TRIM command, it is crucial to check whether the command has already been disabled. To do so, follow these steps:
- Type “cmd” in the Windows search bar.
- Right-click on the Command Prompt and select Run as administrator.
- Type the following command and press Enter
fsutil behavior query disable delete notifyIf the command returns DisableDeleteNotify = 1, the command is already disabled. If the command returns DisableDeleteNotify = 0, the command is enabled, and you need to disable it. Here’s how to do it:
- Type “cmd” in the Windows search bar.
- Right-click on the Command Prompt and select Run as administrator.
- Type the following command and press Enter.
fsutil behavior set disabledeletenotify 1It’s important to reboot your computer once the command has been disabled to allow the change to take effect.
Disable TRIM to Keep Deleted Data Retrievable
By now, you should know why you should disable TRIM and how to do it. Even though it gives you peace of mind that accidental data loss will be recoverable, you should turn it back on if disabling it bogs down your drive’s performance.)
How to re-enable TRIM on your SSD
To re-enable TRIM, open the Command Prompt and type the following command:
fsutil behavior set DisableDeleteNotify 0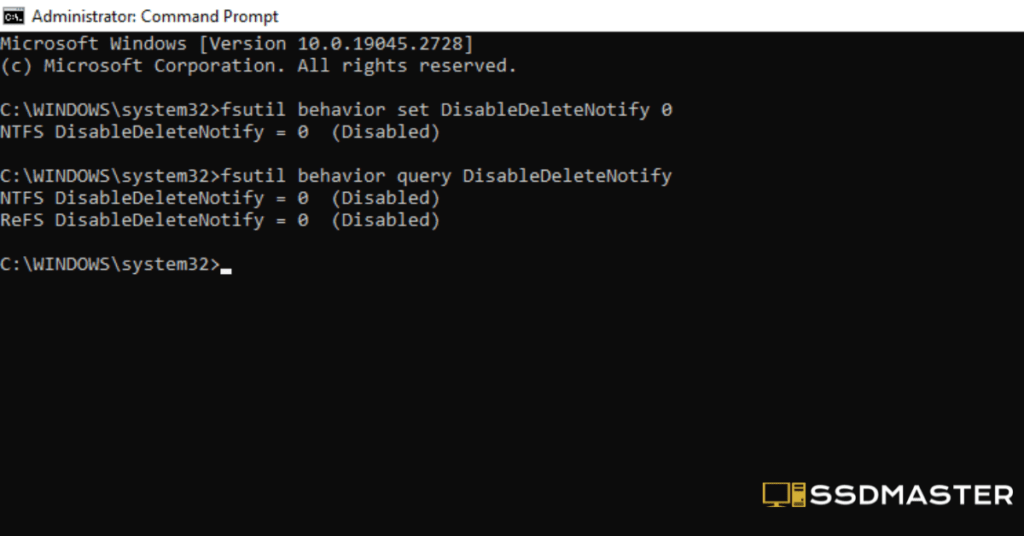
This command will enable TRIM on your SSD.
How to check if TRIM is enabled or disabled on your SSD
You can check TRIM’s current status by opening the Command Prompt and typing the following command:
fsutil behavior query DisableDeleteNotify
If the result is “0,” TRIM is enabled. If it is “1,” it is disabled.
Best-selling top SSDs
Conclusion
In conclusion, disabling SSD TRIM may be necessary for certain situations, such as when using an older operating system, an incompatible drive, or virtualization software. Following the step-by-step guide provided in this article, you can quickly and easily disable TRIM on your SSD.
FAQs
What is SSD TRIM, and why is it important?
SSD TRIM is a command that informs the SSD which blocks of data are no longer in use and can be safely wiped. It helps maintain the drive’s performance and prevent performance degradation over time.
When should I disable SSD TRIM?
You should disable SSD TRIM if you are using an older operating system, an incompatible drive, or virtualization software.
Can disabling TRIM harm my SSD?
Disabling TRIM does not harm the SSD, but it may result in a reduction in performance over time.